Have a lot of shirts you never wear anymore but are somewhat sentimentally attached to? Are your winters kind of cold? Make them into a t-shirt quilt!
§ About 20 old t-shirts
§ New fleece blanket (I used a 60 x
80 throw from ROSS) (It’s soooooo soft)
§ Rotary cutter (one with a really
sharp blade… see photos to come)
§ Cutting mat
§ Scissors (see above)
§ Neutral colored thread (I used
cream and it didn't show through the gray)
§ Quilting grid (they’re around 20
bucks but it’s a great investment)
§ Lots of Straight pins
§ Sewing machine
§ Iron and ironing board


First, cut all of your shirts along the edge seams. You'll end up with 2 piles- fronts and backs.

I laid out the back of the quilt (the fleece blanket) on my bed and folded all the fronts to get an idea of what the quilt was going to look like.
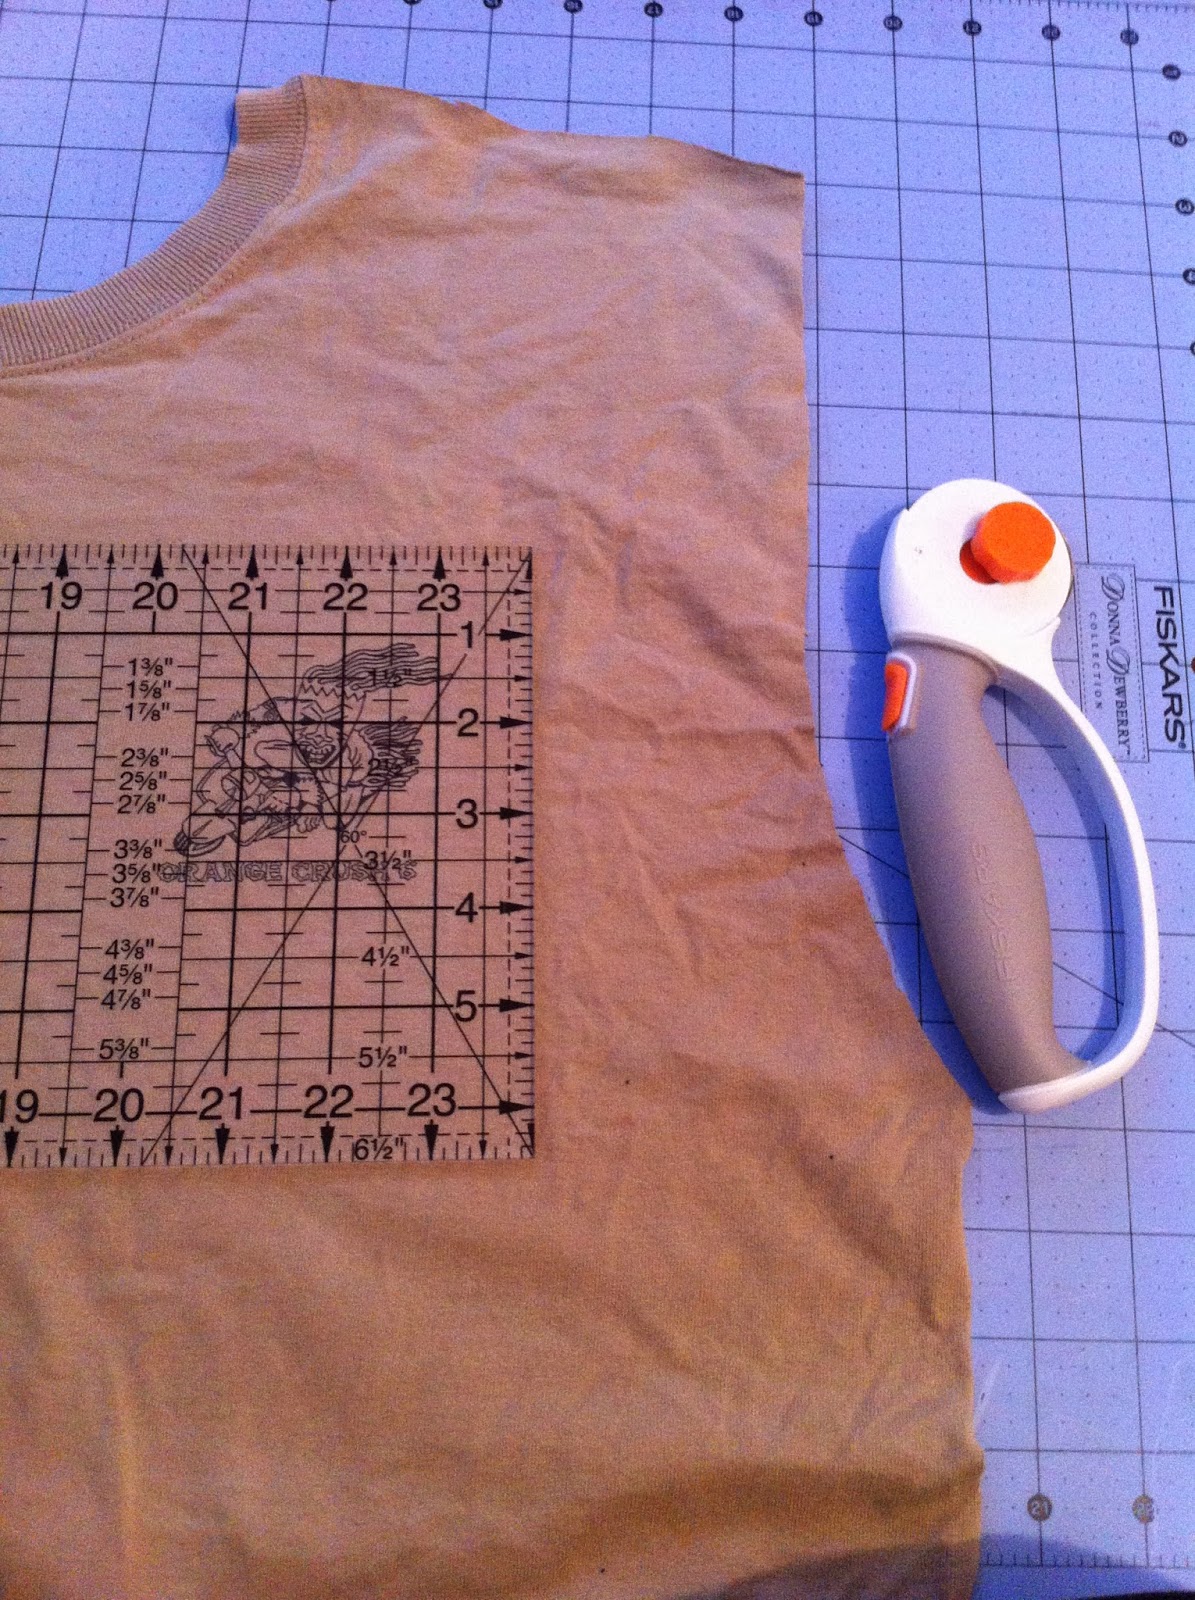
Next, use your quilting
grid and mat to center your first block then cut out the center graphic of your
shirt. You might want to keep the rest of the shirt front for the accent strips.
This quilt was so improvised that I changed placement a few times and needed
more strips than planned.

You're fired, old rotary cutter.
Welcome, new awesome rotary cutter!

I then laid out the border and most of the accent strips. The scooter fabric is called "The British Are Coming" and I love it. Here it is on eBay.

Pin the first two pieces together, front sides touching. Pin on the next piece
of your block, and continue sewing and pressing until your block is built. Tada! Here's the first block.

And the first row of blocks! Pat yourself on the back now. Keep sewing the other 3 rows like before.

Iron the big front part of the quilt and pin the top and bottom parts of your quilt together. Now you can mark out your quilting pattern. You can use quilting tape or a chalk pencil. I opted for a chalk pencil.

Start from the center so it doesn't bunch. It will look like a mess of fabric, but it works.


I needed some tissue paper between the foot and some of the stickier logos.

Looks pretty rad, right? It's time to cut off the excess fleece blanket and make sure your quilt sides straight.


Now sew on the edging and tada, it's done!
No comments:
Post a Comment